This is a guest post by Darren Wright. Read more about Darren at the end of this article.
Whilst the Spark range of amps from Positive Grid are primarily designed with home practice use in mind, many people have found that there is considerable utility to be had when using these devices in larger settings such as at parties/gatherings and in live performances. When using the Spark in this way, it is often beneficial to be able to connect the device to external amplification equipment to increase the available volume and allow it to be heard above people and other instruments. With the release of the Mini and the GO, both of which feature switchable line level outputs from their headphone sockets, Positive Grid have now made this even easier and more straightforward to do. This guide attempts
to help you decide on the best connection options for your specific use case given the type of Spark that you own and the external audio equipment that you plan to use.
Audio equipment is hugely varied and contains many different types of connectors and cables. Audio signals are essentially electrical voltages and these too vary widely at various stages of the signal chain and dependent on the nature and specifications of your equipment. This post is a guide only and neither the author nor the Admins of this groupaccept any responsibility for any damage caused to your equipment by following the information contained within it. Do your own research and understand your own equipment.
Background
All of the presets available on the Spark range of amps include both amp and speaker/cab modelling accompanied by various types of effects. This modelling closely replicates the EQ curves and frequency responses of the real-life gear it is trying to emulate. For this reason, it is not ideal to then connect any of the Sparks to regular guitar amps which impart their own amp and speaker cabinet tonal characteristics to your signal chain (this is what gives certain amps and speaker cabinets their signature sounds that they are known for – e.g. the “Marshall sound” or the “Vox sound”). Whilst it will work, this “double-stacking” of tonal colouration can lead to muddy-sounding or sub-optimal tone to your signal and is not the recommended way of amplifying the Spark’s signal.
Of course, you may wish to use your Spark purely for the pedal sounds that it can provide and turn the amp and cab emulation off completely within your patch / preset. This is possible and you may find this gives better results when connecting to the front end of a guitar or bass amp by using the physical amp’s pre-amp tones instead of those provided by the virtual amp in the Spark.
The tonal colouration imparted to your audio signal by guitar and bass amps occurs in three main areas:
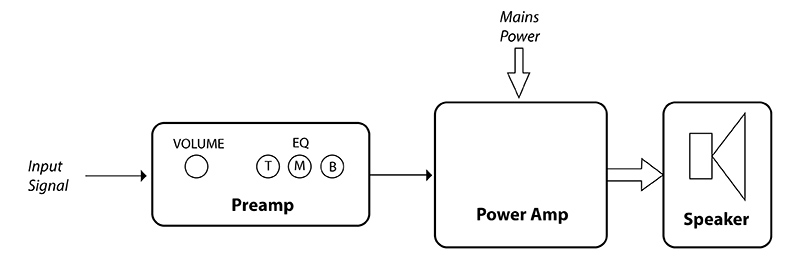
- The pre-amp – where the relatively weak instrument-level signal from your guitar or bass is amplified to a level that the power amp section can then amplify further, enough to drive a speaker (or speakers). It is the pre-amp section of your amp that your amp’s tone controls (typically bass, mids and treble) apply to and where you can begin to shape your sound. The pre-amp gain (or input gain) of your amp determines how much your initial signal is amplified by and can normally be adjusted to either accommodate different levels of output of different guitars (e.g. passive v active pickups, etc.) or, for tonal effect to deliberately overdrive the pre-amp section and cause it to “break up” or distort. In the case of an analogue valve (or tube) pre-amp section, such analogue break up or distortion can often be pleasing and desirable to the human ear as it adds additional harmonic elements to the signal and does not clip in the same way that a transistor or digital amp would (which often sounds harsh by comparison and can introduce digital artefacts to the sound). Modelling amps try to emulate this effect sometimes, when using crunchy or overdriven tones for example.
- The power amp – this section of the amplifier takes the signal from the pre-amp and boosts it significantly in order that a speaker can be driven to create sound waves (caused by the speaker cone moving back and forth). All sounds are made up of a collection of these waves, often at different frequencies and amplitudes (volume or strength of signal). Bass amps typically need higher power amps as they often use larger speaker cones and move them back and forth more to create the much larger sound waves that are needed to properly re-create bass frequencies. This is a matter
of physics and is hard to get around. In the case of a valve (or tube) power amp section, again these can be overdriven to the point of breakup / distortion to impart additional harmonics to the signal and give even more “crunch”. However, this often has to happen at an extremely high volume which makes such an effect difficult to achieve at home practice levels (assuming no pedals are being used to boost your signal). This is why many valve amps have lower power options allowing you to drive
the power amp section to the point of breakup without having to play at extremely high volume. - The combination of the speaker(s) and cabinet enclosure outputting the sound. This not only depends on the type of speakers and their frequency response but also how many of them there are, how they are arranged and the dimensions, shape and material of the cabinet. Speakers are often tuned by manufacturers for specific applications and to give a certain colouration to the sound (for example, Beats headphones are known to produce a lot of low-end frequency content and be very
“bass-y” – great when listening back to dance music and hip-hop, not so good when trying to mix and master a song in a DAW and you need a more faithful recreation of what is happening to the frequencies in your mix). Speakers (or headphones) that do not add colouration are often referred to as “transparent” or “FR/FR” (standing for full range / flat response) in that they replicate all frequencies within the range of human hearing (20Hz to 20KHz) and they do this without boosting or cutting any of them. If you were to look at their frequency curve on a graph, it would appear as a
flat horizontal line. PA speakers and studio monitors are particularly good examples in that they mostly try to recreate faithfully exactly what they receive and not change it in any way.
The hierarchy of audio signal levels (dictated by voltage strength and starting with the weakest moving to the strongest) is as follows:
- Mic level (from microphones and normally goes into the pre-amp of a mixing desk to raise it further)
- Instrument level (typically from guitars and basses)
- Line level (the standard for the connection of audio gear to each other)
- Speaker level / Headphone level (an amplified output signal that you will hear from
- the end of the signal chain)
Spark 40

This has a stereo headphone-only output which is an amplified signal and hotter than “line-level” (which is the normal standard used to connect sound equipment together). The method of connection and type of cable needed are dependent on what you intend to connect it to and the nature of the inputs of your external equipment. Depending on the quality of the headphone amp section, this may introduce noise into the signal chain and may have a higher noise floor than a line level signal (as it is amplified).
Connection to guitar amps and cabs
If you plan on connecting your Spark 40 to the mono front end input of a guitar amp or some other kind of power amp (such as the popular Magnum 44 amp pedal) and then into a guitar speaker cabinet (not ideal as previously stated), you should use a summing cable with resistors. The simplified reason for this is that you are taking a stereo signal from the Spark and trying to “squeeze” it into a mono input and without a proper summing cable, there is a risk that you can damage the headphone amplifier section of your Spark due to the shorting of parts of your signal chain (left, right and ground). This may not happen but it is a risk that can be mitigated by the use of a proper summing cable.
If your guitar amp has an aux-in (normally a 3.5mm or 1/8” connection), this is typically a stereo input and is expecting to see a line-level signal coming into it from a CD player / MP3 player / iPod, etc. There is no need for a summing cable here as you are taking a stereo signal from the Spark and going into a stereo input on your guitar amp. The aux-in input of your guitar amp also often typically bypasses the pre-amp section of your amplifier and therefore will not impart the same pre-amp colouration to your signal that plugging into the main input of your amp will. This is more desirable as the only additional colouration you are then adding to your signal is from the speakers and cabinet (and possibly the power
amp section too depending on your amp).
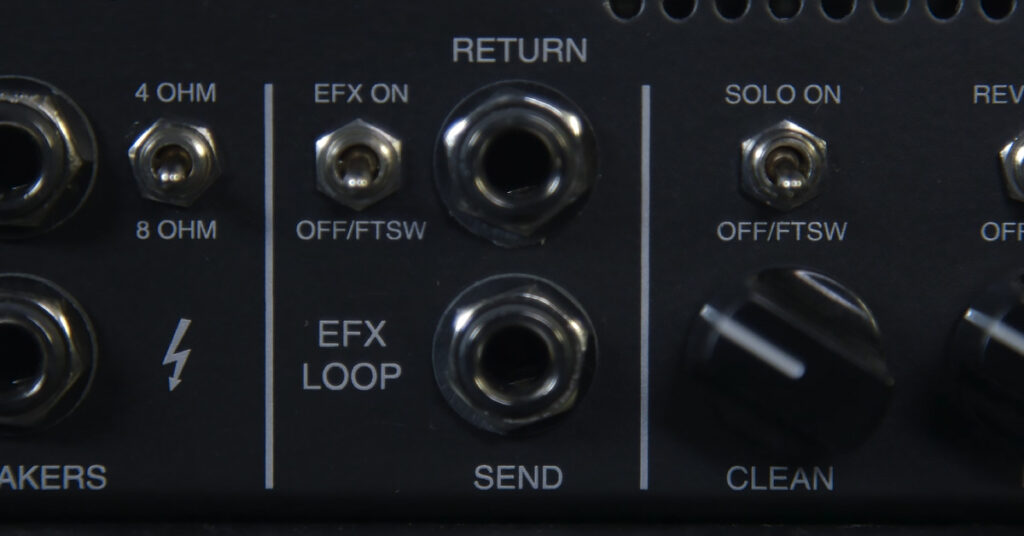
If your guitar amp has an effects loop (often found on the rear of the amp and labelled “send” and “return” or similar using 1/4” jacks), this too appears in the signal chain after the pre-amp section and so leads to less signal colouration as a result. You can go from your Spark 40 to the “return” input of this effects loop and you are essentially plugging straight into the power amp section of your guitar amplifier. As this is normally a mono input, again a summing cable should be used for this. This too is more desirable than plugging your Spark into the front end of your guitar amp. This effects loop is often expecting to see a line-level input so start with your volumes low and work up from there.
You cannot connect your Spark 40 directly to an unpowered guitar speaker cabinet as the headphone amplifier section of the Spark is not powerful enough to drive external unpowered speaker cabinets. A power amp of some description is required in the signal chain between your Spark and the speaker cabinet.
Connection to powered PA speakers or mixing desks
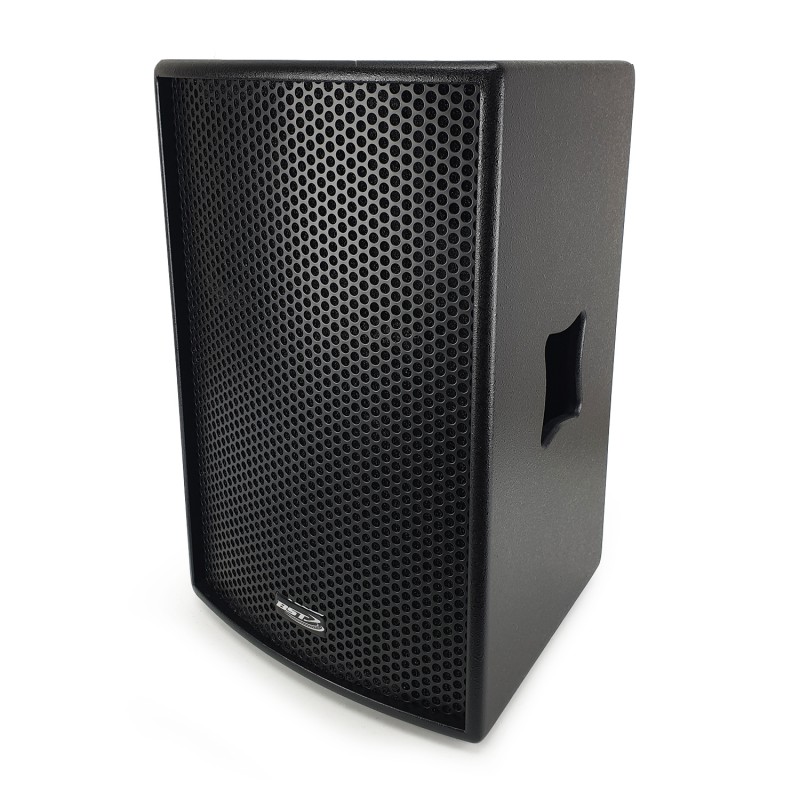
This is the optimum way to connect your spark to external gear as the speakers for PA applications are mostly designed to be as flat as possible and simply replicate what they receive with little to no additional colouration of their own. They also tend to cover a wide frequency response as they have to playback a wide range of audio sources. The frequency range of human hearing is 20Hz to 20KHz and PA speakers often cover most or all of this range. Studio monitor speakers are also ideal for the same reasons but may not be suitable for live performances or playing out and may be better suited to home use. You would
normally connect to these via an audio interface that is connected to your computer.
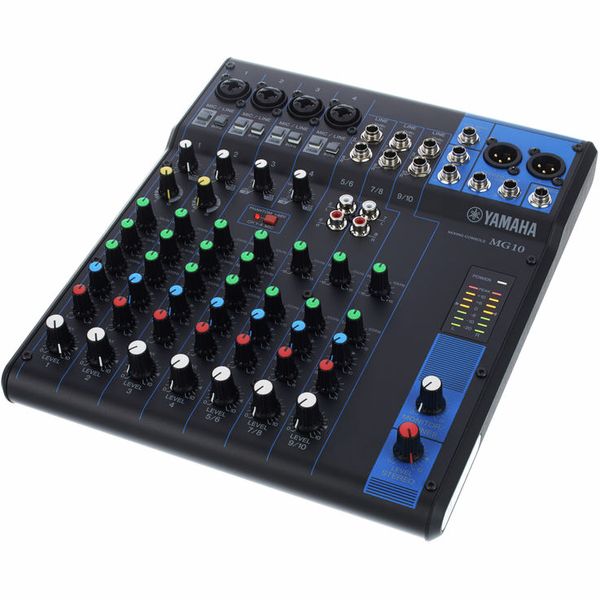
Mixing desks generally have a number of different ways to connect your gear. For your Spark 40, the following are the most common:
- Headphone out of Spark to a stereo input on your desk (normally two 1/4” jack inputs). For this you will need a stereo splitter cable (often called a “Y” cable due to its shape). This will have a 3.5mm or 1/8” stereo plug on one end (for your Spark’s headphone socket) and will branch off into two mono 1/4” plugs (one left, one right) that you then connect to the left and right stereo inputs / channel strip of your desk. Your desk’s stereo input / channel strip is expecting to see a line level signal, not the hotter headphone level amplified signal from your Spark. For this reason, start with the Spark’s volume low and build it up from there. Ensure your stereo channel strip is set to a flat EQ (no frequencies boosted or cut) and that no effects are applied on the desk. Shape your sound using the controls within the presets of the Spark app. If you find you need additional EQ shaping then use the desk controls for this remembering that it is normally better to try cutting frequencies rather than boosting them and that whenever you adjust these, you are also adding or taking away gain from the signal path.
- Headphone out to two mono desk inputs (normally either 1/4″ or XLR inputs). For this you will need the same splitter cable as before only this time you are taking up two mono channel strips on your desk (normally where the mics are connected). Many desks have combo inputs for this and will accept either mic level or line level signals (check your desk’s specifications for this). As one of these channel strips will be taking care of your left signal from the Spark and the other the right, you should pan each hard left and hard right on the desk to maintain the stereo image of your Spark. Again, start with the volume on the Spark low and everything flat on the channel strip (normally at the 12 o’clock position) and build up from there.
- Headphone out to RCA. These are the red and white phono plug connections typically found on mixing desks to connect external audio gear for the playback of pre-recorded music. For this type of connection you will need a 3.5mm or 1/8” stereo plug from the headphone of your Spark to twin RCA phono plugs (white and red, left and right). Whilst this will work just fine, it is not as flexible as the previous two desk connection options as the RCA inputs on most desks offer little or no additional EQ tone shaping or adjustments. Again, start with the output volume of your Spark low and build it up.
- Powered PA speakers may have mono XLR or 1/4” inputs with some also having RCA inputs. Some have small mixers built into them enough for two channels, others are mono only. If you are using a mono input and squeezing all of your Spark 40’s stereo signal into it, use a summing cable with resistors and whatever connection on the other end of your cable that your PA speaker needs. Your speaker is probably expecting to see a line level signal into its input (from a mixing desk output or other line level source) and so again, start with your hotter Spark headphone-level signal low on the volume of the Spark and work up from there. If your PA speaker has a stereo RCA connection (white and red, left and right) then follow the instructions above for connecting to the same inputs on a mixing desk – no need for a summing cable as these inputs are stereo (which will then be summed inside the speaker to play in mono from the speaker). If you have two powered PA speakers with no mixing desk, you can use a stereo splitter (or “Y” cable) to go from your Spark’s headphone socket to each of the mono inputs of your speakers and use the speakers as a stereo pair. No summing cable is needed for this application as you are not attempting to convert thestereo Spark signal into a mono signal.
If you are planning on doing something like this on a regular basis or for live performances, you should consider using a DI box between your Spark and your desk or speakers. The output from the Spark is an unbalanced signal and can lead to unwanted noise (buzzing or humming) getting into the signal chain, particularly when using longer cable runs and in an environment with lots of other cables and signals present. A DI box will convert the unbalanced signal from your Spark into a balanced mic-level signal that your desk can then work with comfortably and will provide other benefits such as a ground lift switch to help in eliminating unwanted signal noise.
The author of this post has discovered that the StageBug SB-2 DI box by Radial Engineering will not only provide all of these benefits but will also sum any stereo input it receives into a balanced mono output. This means that you can go from your Spark 40’s stereo headphone out, via a splitter cable into the two 1/4″ inputs of the StageBug and then from there, via a standard XLR cable, into one mono channel strip of your desk (therefore only taking up one channel on your mixing desk). Although this is extra expense (£80 GBP at the time of writing) it might be something you would want to consider when using your Spark for live performances (and sound engineers will thank you for it!). If you use this device, you no longer need a summing cable for any of the aforementioned use cases where one was recommended. It has the added benefit of protecting your Spark against any adverse effects from someone accidentally engaging phantom power on the mixing desk.
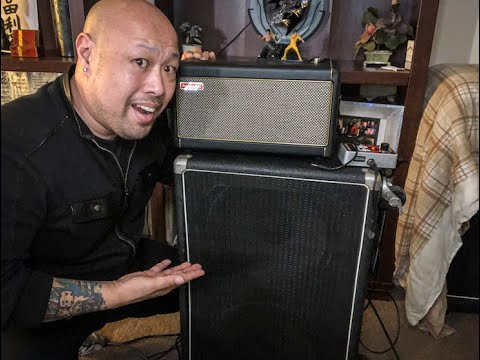
Spark GO and Spark Mini
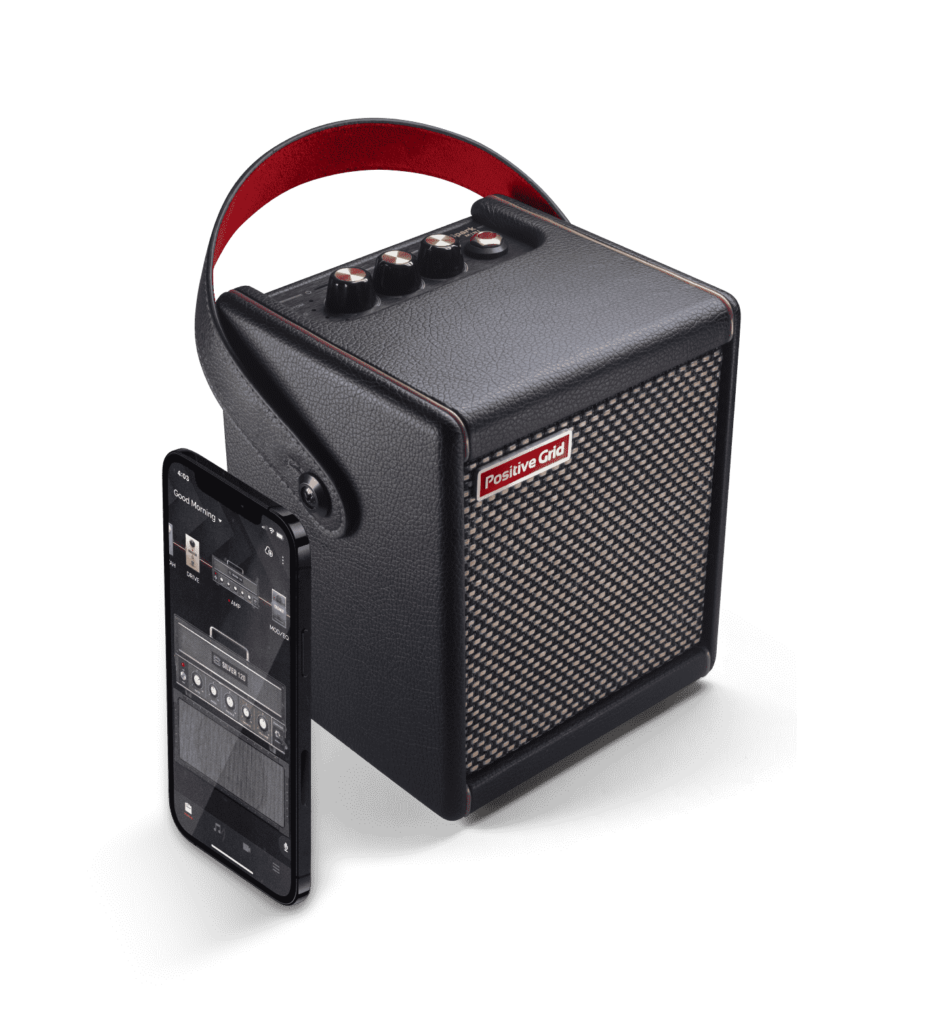
Credit: Positive Grid

Credit: Positive Grid
These both have one extremely useful feature that sets them apart from the 40 when connecting to external audio equipment – the ability to switch their output from stereo headphone-level to mono line-level within the app. This is the reason that the GO makes a great choice for using as a pre-amp or digital modelling “pedal”. If you haven’t purchased a Spark product yet and are considering using it a lot for connecting to external audio gear, either the Mini or the GO makes a better choice than the 40 in the opinion of the author.
A mono line-level signal is the common standard for the connection of audio gear and what many audio devices are expecting to see and can work with. There is no longer a need for a summing cable (as your Spark is now doing the summing internally for you) and your connection options suddenly become much more straightforward and with a better signal quality. All you have to do is to remember to set the output to “mono line-level” in the app. You can then use whatever standard cables and plugs you need to connect to the audio gear of your choice.
The same considerations apply for connection to guitar amps, with aux-in’s and effects returns being much preferred over direct connection to the guitar input on the front end.
Conclusion
In summary, if you want the best possible experience from your Spark (of whatever type) when connecting to external audio equipment for amplification, the best possible option is a transparent FR/FR PA-type speaker, either directly to the speaker itself if you want a small portable rig or via a mixing desk. Headrush cabs seem to be popular on these pages but are simply a brand of FR/FR speaker – others are available.
The author uses Yamaha DBR-12’s and, on occasion, the cheaper Behringer Eurolive 12D’s. If you plan on using this application for bass guitar in the form of a mini rig, consider a 15” PA speaker instead as this will cope better in replicating the bass frequencies of your instrument without the need for a separate sub-woofer (as previously mentioned, you can’tcheat physics!).
As a side note, some users of the Spark 40 complain of it being overly-bass-y with too much low end. Whilst there are a number of remedies for improving this, simply getting it up off the floor and away from walls (particularly the corners of a room) may be enough to reduce the effect to a more pleasing level if you are troubled by this. The soundwaves created by bass frequencies can quickly accumulate in a room and be amplified further by things such as “acoustic coupling” and a phenomenon known as “standing waves”.
Lifting your amp off the floor and moving it around in a room can solve this problem for you without having to do anything further. Experiment with different positions and you may find something that works for you. Whilst it is nice to have a room with proper acoustic treatment, simple things like closing your curtains or hanging a duvet or blanket on a rail within the room can be sufficient to dampen problematic soundwaves and improve your experience by reducing the amount of audio reflections that are taking place within the room.
Standing waves are worsened in rooms with parallel walls (which happens to be the way that most rooms and houses are designed) and breaking these up with soft absorption materials (rather than hard surfaces that reflect soundwaves) can lead to a better sounding space. For acoustic guitar, using one of the Sparks as an acoustic pre-amp and selecting one of its virtual acoustic amps (and whatever effects you like) and then amplifying this through a transparent speaker setup can give excellent results. Whilst connection to a regular guitar amp and cab is completely possible and you may be really pleased with the results you get (depending on your set up), it is unlikely to offer the same experience as a truly transparent speaker setup with the Spark’s tone remaining unaffected by any other forms of colouration in the signal chain.
Enjoy your Spark and play more guitar!
About the author
Darren has been involved in live sound and studio recording for over 15 years. He plays guitar and bass and is currently on bass and lead vocal duties for Irish punk / rock tribute band “Tube Station”. He was touring Europe for most of 2021/22 in a punk tribute to The Jam called “Absolute Beginners”. He is currently half way through a Masters of Science Degree in Audio and Video Forensics and is about to embark on a Post Graduate Certificate in Audio-Visual Post Production. He is the proud owner of both a Spark 40 and a Spark GO.
Hi,
Thank you for this extensive article about connecting the Positive Spark Amps to external gear.
I have a Pisitive Spark 40 Pearl, that ai connected with a head amp the following way :
– Spark 40 Headphones Out to G4M GA-100H 100W Head amp’s Aux In
– via a Hama stereo audio 3,5mm cable
The connection works, but it produces a constant high pitch background sound not loud but really annoying…
– by itself, the Spark 40 Headphones Out connected to headphones does not produ^ce this high pitch sound at all => the Output interface is OK
– the amphead Aux In connected to a Tablet or a phone does not produce that high pitch sound either => the cable is OK for this connection
Questions :
1.- have you ever come across this issue before ?
2.- do you know where it is coming from ( grounding issue ? Cable’s type : with/ without shielding ? )
3.- Is this high pitch sound indicating something dangerously not OK ? Or is it without long term consequence on the Spark 40 integrity ?
Thank you for helping me with this issue if you can.
Best regards,
Francesco De Grandi
Switzerland
PS : I ordered a Summing cable, as recommend in your article, to connect the Spark 40 headphones Out either to the Return IN of the Headamp’s effect’s loop, or even to the guitar In. I am just waiting for it to be delivered in about 10 days : I will then report here about the results of these connections.
Regarding my previous comment :
– a Summing cable works perfectly to connect the Spark 40 headphones Out either to the Return IN of the Headamp’s effect’s loop, or even to the guitar In
– in order to get red of the high pitch hiss sound, I am using an audio Ground Loop Noise Isolator 3.5mm AUX Cable – ~7 $ on Ebay
All is well : I am able to get all the available presets of my Spark 40 to play on my G4M GA-100H 100W Head amp and even to use it’s settings to improve those presets…
Cheers !
I use a TASCAM DP-O1 FX for recording. It uses 1/4″ inputs.The Spark uses USB out for recording right. Is there are a way to convert the USB signal to 1/4″ ( if that make sense?)
No – the Spark uses USB to connect to computers as an interface (from which you can record) – it will not communicate with your Tascam in this way. For recording into your Tascam, take a cable with a 3.5mm stereo jack on one head (from the Spark headphone socket) to dual 1/4″ mono jacks on the other end – connect these to two channels on your Tascam and pan one hard right and the other hard left. Keep the Spark volume low to start with while you are setting your levels so you do not clip the Tascam. That should get you where you need to be, Darren.
I have a used spark 40 coming from ebay. Also a PAC SNI-50A Adjustable High Power Line Output Converter. I should be able to pull stereo RCA line outs directly from the speaker cables without affecting normal play through…right? Passive LOCs are used in car and home audio all the time. Why would this be any different? Of course I plan to use a multi-meter to hit the 1-2v target.
My spark 40 Will not power up… The power cord is good at 19 V and I’m wondering if I can replace the electronic motherboard or you have any suggestions… Thanks
I haven’t scoured this site, but I’m finding nothing about the Spark Edge. I traded my Spark 40.
It’s not a practice amp. Perfect for Buskers, light, portable and battery operated (although the battery is an extra).
Will there be posts on this newer product? Are there other EDGE owners here?
I’m a happy Edge owner. I traded my Spark 40, and I’m very glad I did. Line level outputs are the real difference. It’s effortless to connect the Edge to external amps. Gotta love the battery option, too.
The Edge, at 65 watts, really surpasses the 40 in every way. Highly recommended.
Dear Sir
I have a spark amp but wondered if I can connect a zoom G3XN and play them into the pa mixer system. Advise please. Thankyou